Datasource
In today’s data-driven world, enterprise data is scattered across diverse landscapes — files, databases, object stores, cloud warehouses, and APIs embedded within various applications. At xVector, transforming this fragmented information into actionable insights begins with Data Sources.
The Gateway: Data Sources
Section titled “The Gateway: Data Sources”Data Sources are the gateway, allowing users to connect to, import, and synchronize data from multiple origins. Whether the data resides in structured files, dynamic APIs, or sophisticated cloud storage systems, users can configure and execute a connector to bring it into xVector as a data source. A rich catalog of connectors, periodically updated by xVector, ensures compatibility with an ever-expanding array of systems. Missing a connector? Reach out to connectors@xvectorlabs.com, and a new one can be developed quickly.
Once connected, the process doesn’t stop at simply importing data. Updates from source systems are seamlessly upserted, reflecting real-time changes while preserving the historical timeline of values. Bulk data import is supported with the OVERWRITE option. This meticulous synchronization ensures traceability, enabling businesses to trust the integrity and provenance of their data.
A Seamless Experience
Section titled “A Seamless Experience”xVector simplifies the journey from raw data to actionable insights, offering users the tools to acquire, refine, and analyze data confidently. With regular updates to its connectors catalog and robust metadata management, the platform ensures that businesses can harness the full potential of their data ecosystem — turning scattered information into cohesive narratives that drive impactful decisions.
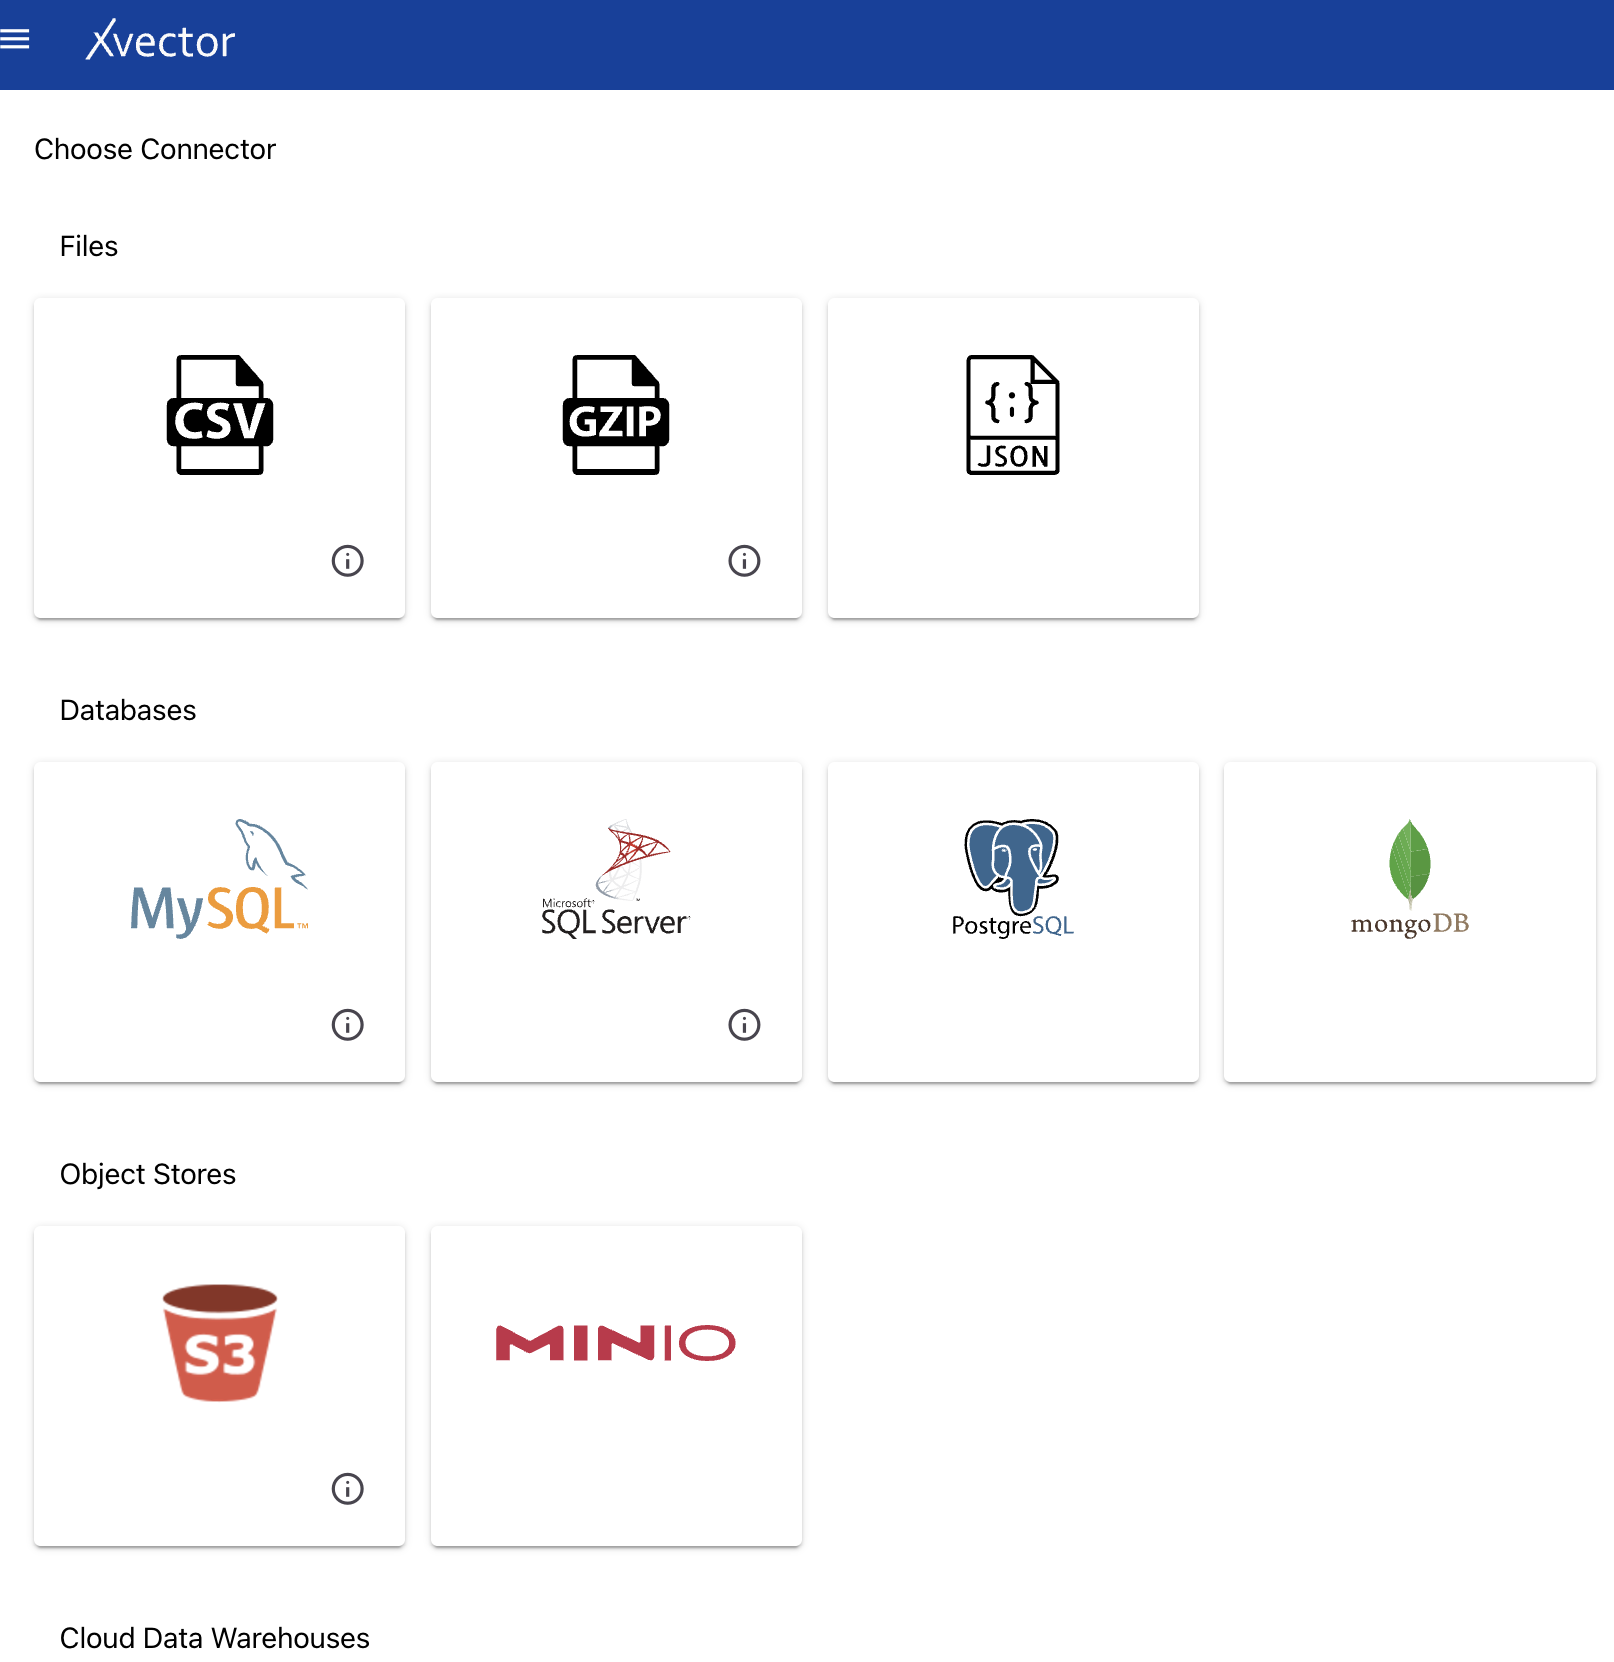
Connectors
Section titled “Connectors”Available connectors by type:
- Files — CSV, JSON, GZIP
- Databases — MySQL, SQL Server, PostgreSQL, MongoDB
- Object Stores — S3, MinIO
- Cloud Data Warehouses — Amazon Redshift, Google BigQuery
- APIs — Salesforce, Mailchimp, Zoho
Common Features
Section titled “Common Features”Metadata
Section titled “Metadata”xVector automatically infers metadata using sampling techniques while creating a datasource. It is recommended that the metadata be reviewed carefully and any corrections made if required. Metadata setting is a crucial step.
| Setting | Description |
|---|---|
| Column Name | Same name as present in the source datasource |
| Column New Name | New name given to a column in the dataset when copied from the datasource |
| Description | Description for a column; available to other users and copied into datasets |
| Data Type | Automatically inferred (int, float, string, date); review for potential errors |
| Format | Applicable for datetime and currency (e.g., ‘YYYY-MM-DD’, ‘DD/MM/YYYY HH:MM:SS’); visualization only |
| Semantic Type | Appropriate semantic type for the column (e.g., SSN, zip code for int columns); used in visualization |
| Statistical Type | Used for visualization and modeling purposes |
| Skip Histogram | Default is false (generates histogram). Set to true for very high cardinality columns |
| Nullable | Default is true. Set to false if column value cannot be null; xVector warns if nulls are found |
| Dimension | Set the column as a dimension; used in visualization and modeling |
| Measure | Set the column as a measure; used in visualization and modeling |
Profile
Section titled “Profile”Data profiling involves examining data to assess its structure, content, and quality. This process calculates various statistical values, including minimum and maximum values, the presence of missing records, and the frequency of distinct values in categorical columns. It can also identify correlations between different attributes. Profiling can be automated by setting the profile option to true or performed manually.
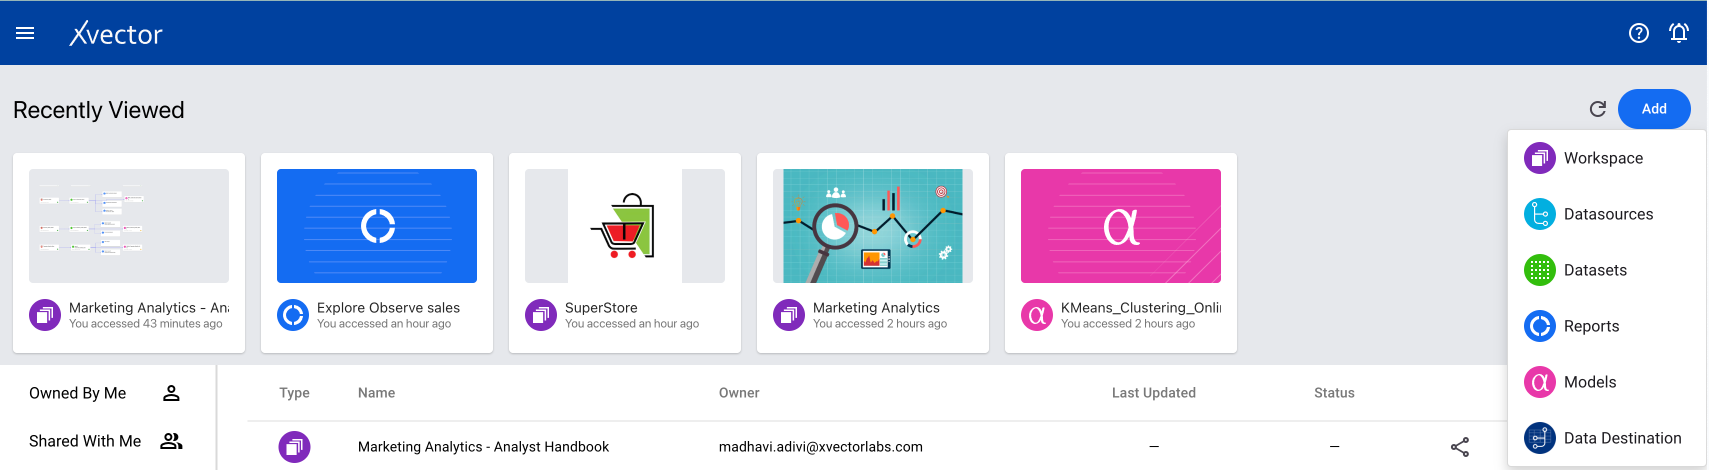
A CSV-type datasource is used when you need to bring CSV data from a local system. From a workspace, click on Add and choose the Datasources option.
Choose the CSV data source type from the available list.
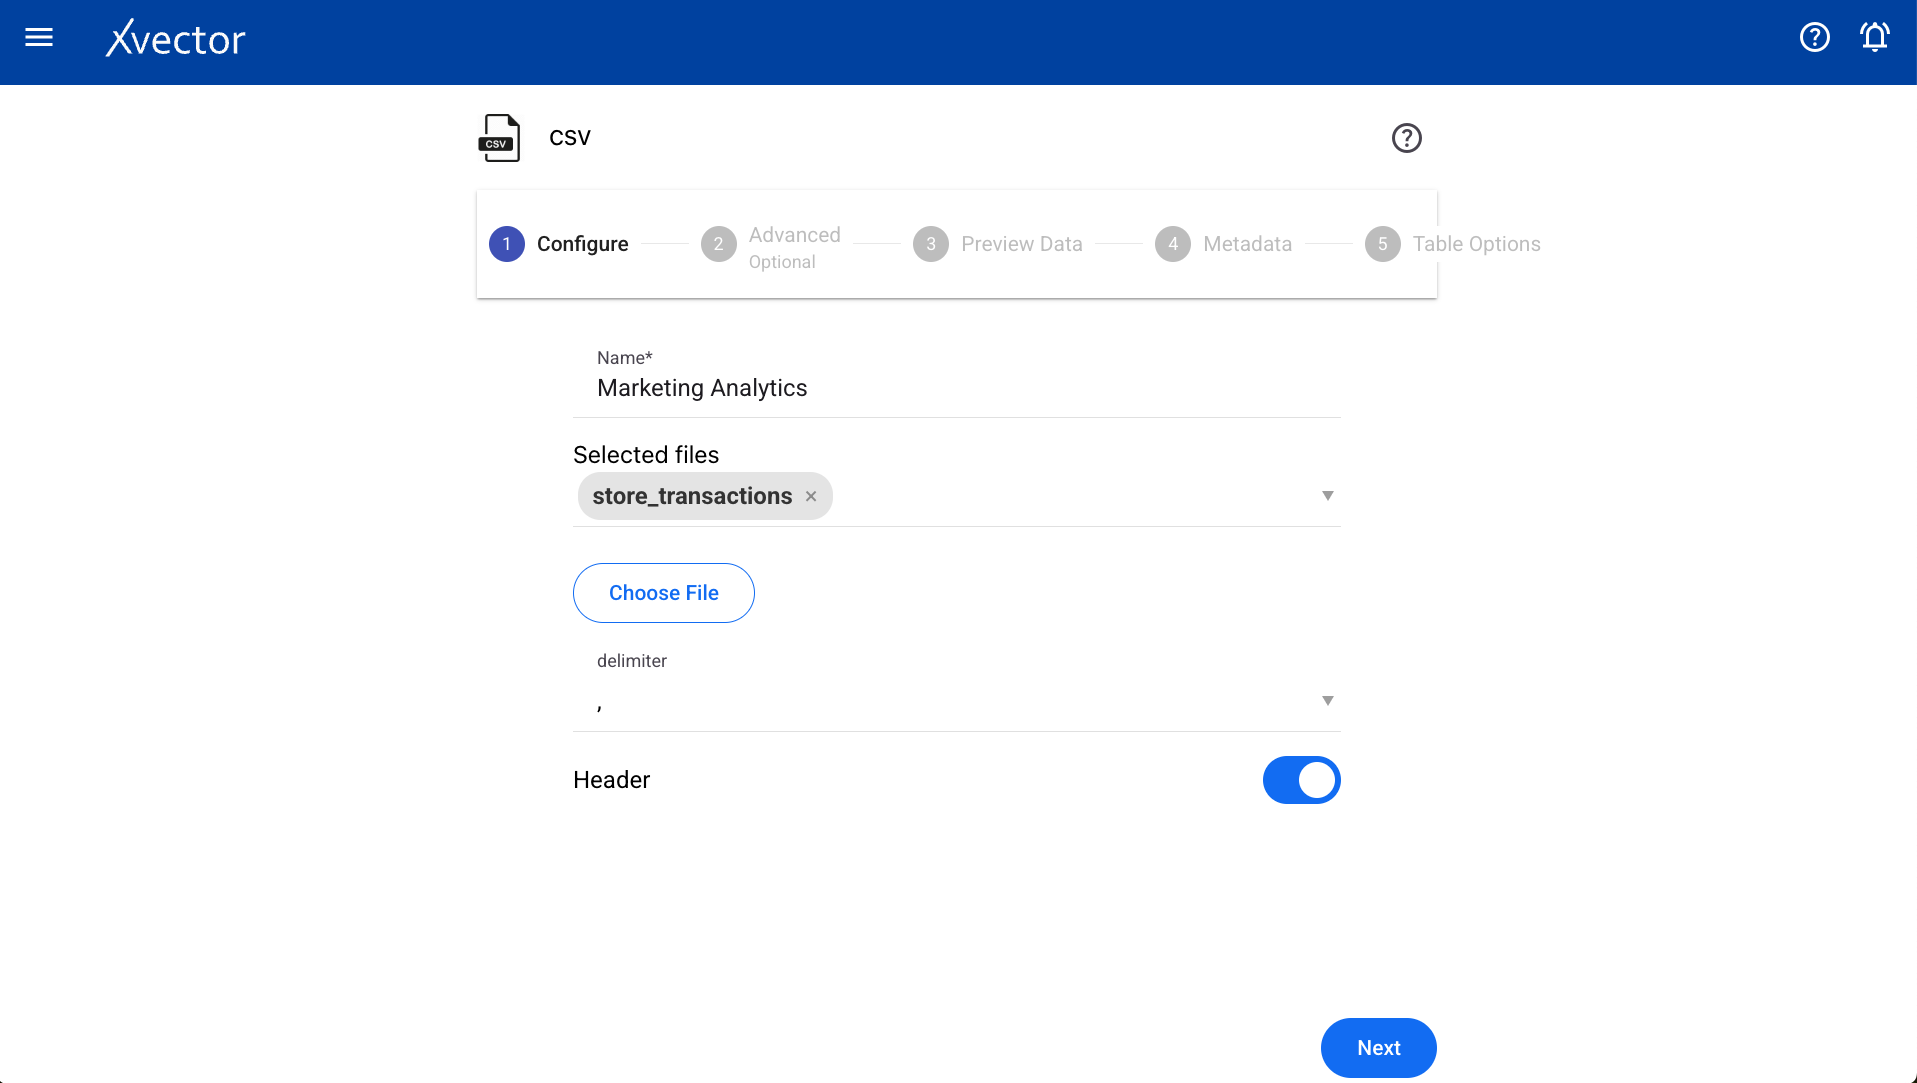
Configure
Section titled “Configure”| Field | Description |
|---|---|
| Choose File | Browse your local system to select the required CSV file |
| Name | Provide a meaningful name |
| Delimiter | Choose a delimiter according to the file |
| Header | Set to true if the header is present, otherwise false |
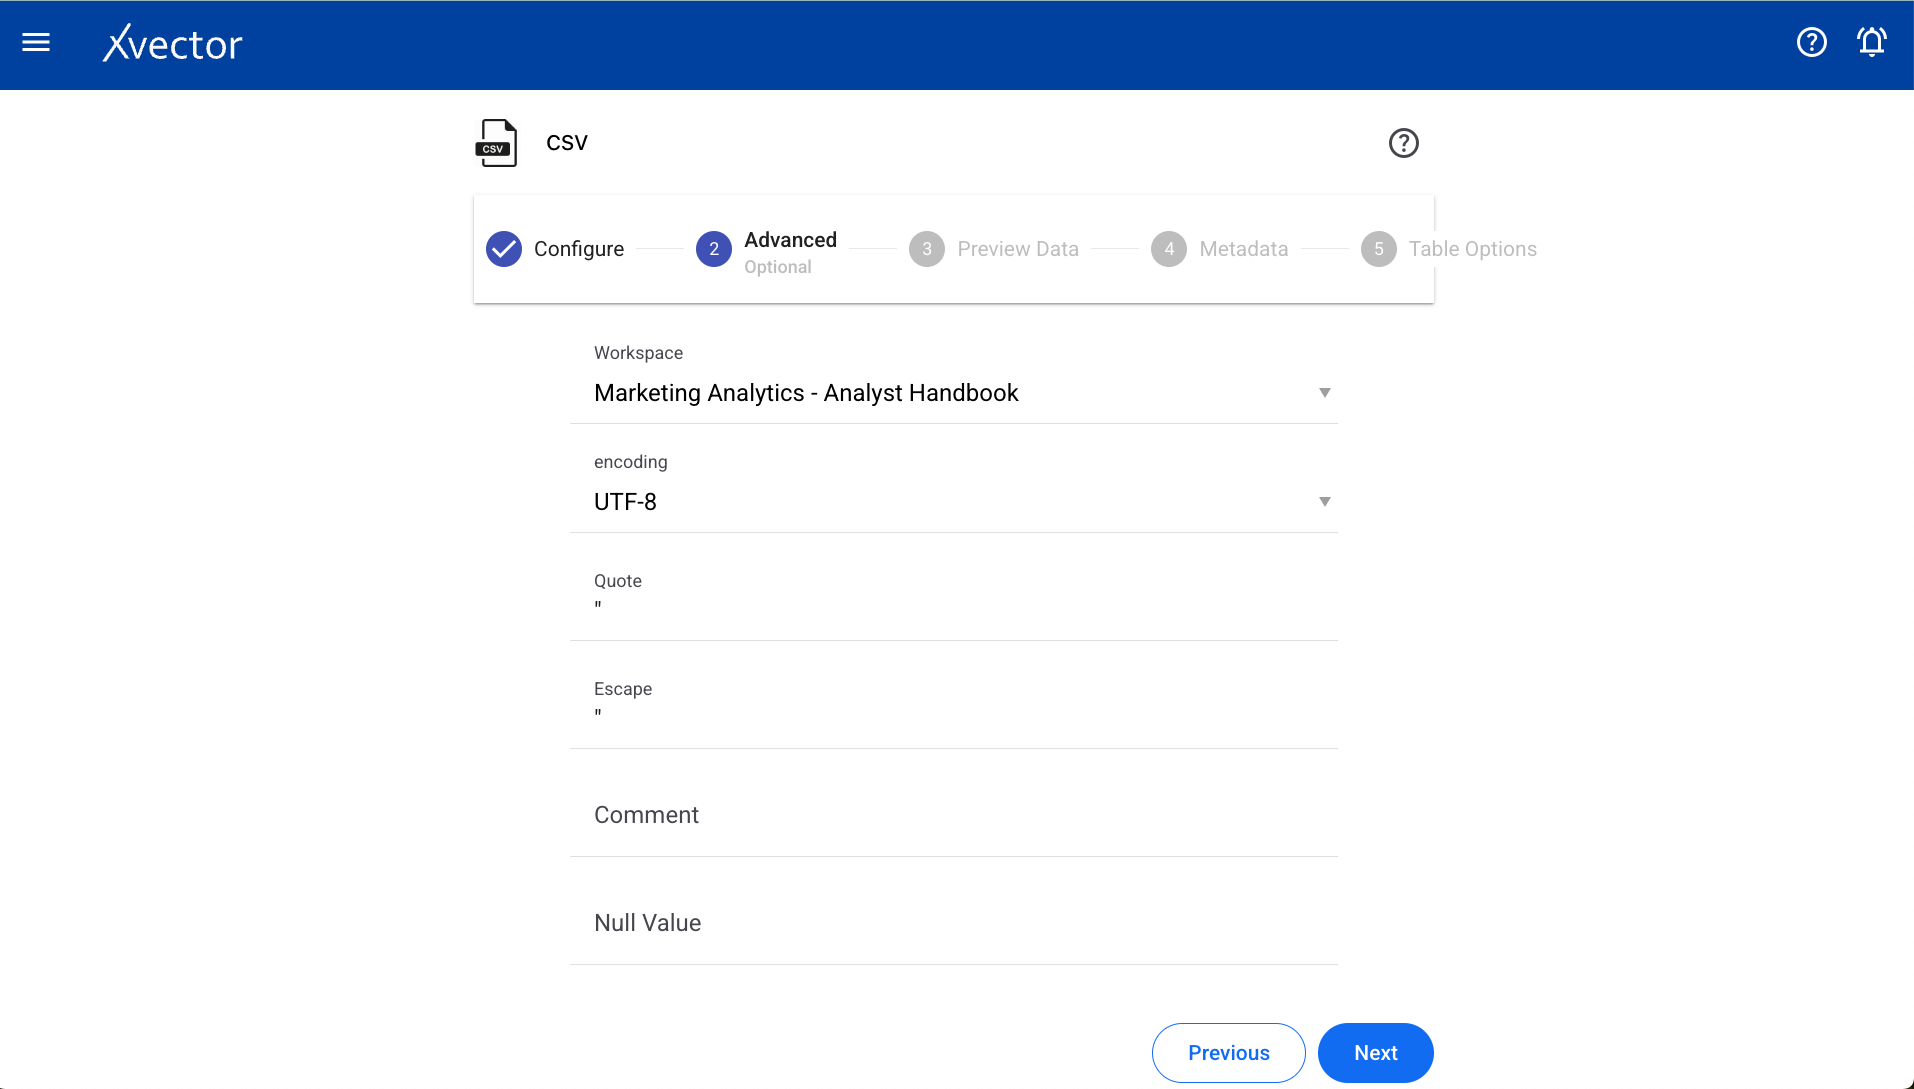
Advanced
Section titled “Advanced”| Field | Description |
|---|---|
| Workspace | Select a workspace for the datasource |
| Encoding | Select encoding |
| Quote | Single character for escaping quoted values |
| Escape | Single character for escaping quotes inside an already quoted value |
| Comment | Single character for skipping lines beginning with this character (disabled by default) |
| Null value | String representation of a null value |
| NaN value | String representation of a non-number value |
| Positive/Negative Inf | String representations of infinity values |
| Multiline | Parse one record, which may span multiple lines, per file |
| Mode | Permissive or drop malformed |
| Quote Escape Character | Single character for escaping the escape for the quote character |
| Empty Value | String representation of an empty value |
| Write Option | Upsert, Bulk Insert, Insert, Delete |
| Run Profile | Set to true for running profile |
| Run Correlation | Set to true for running correlation |
| Machine Specifications | Use default or set to false for custom machine specs |
| Expression | Write expressions to be executed while reading the data |
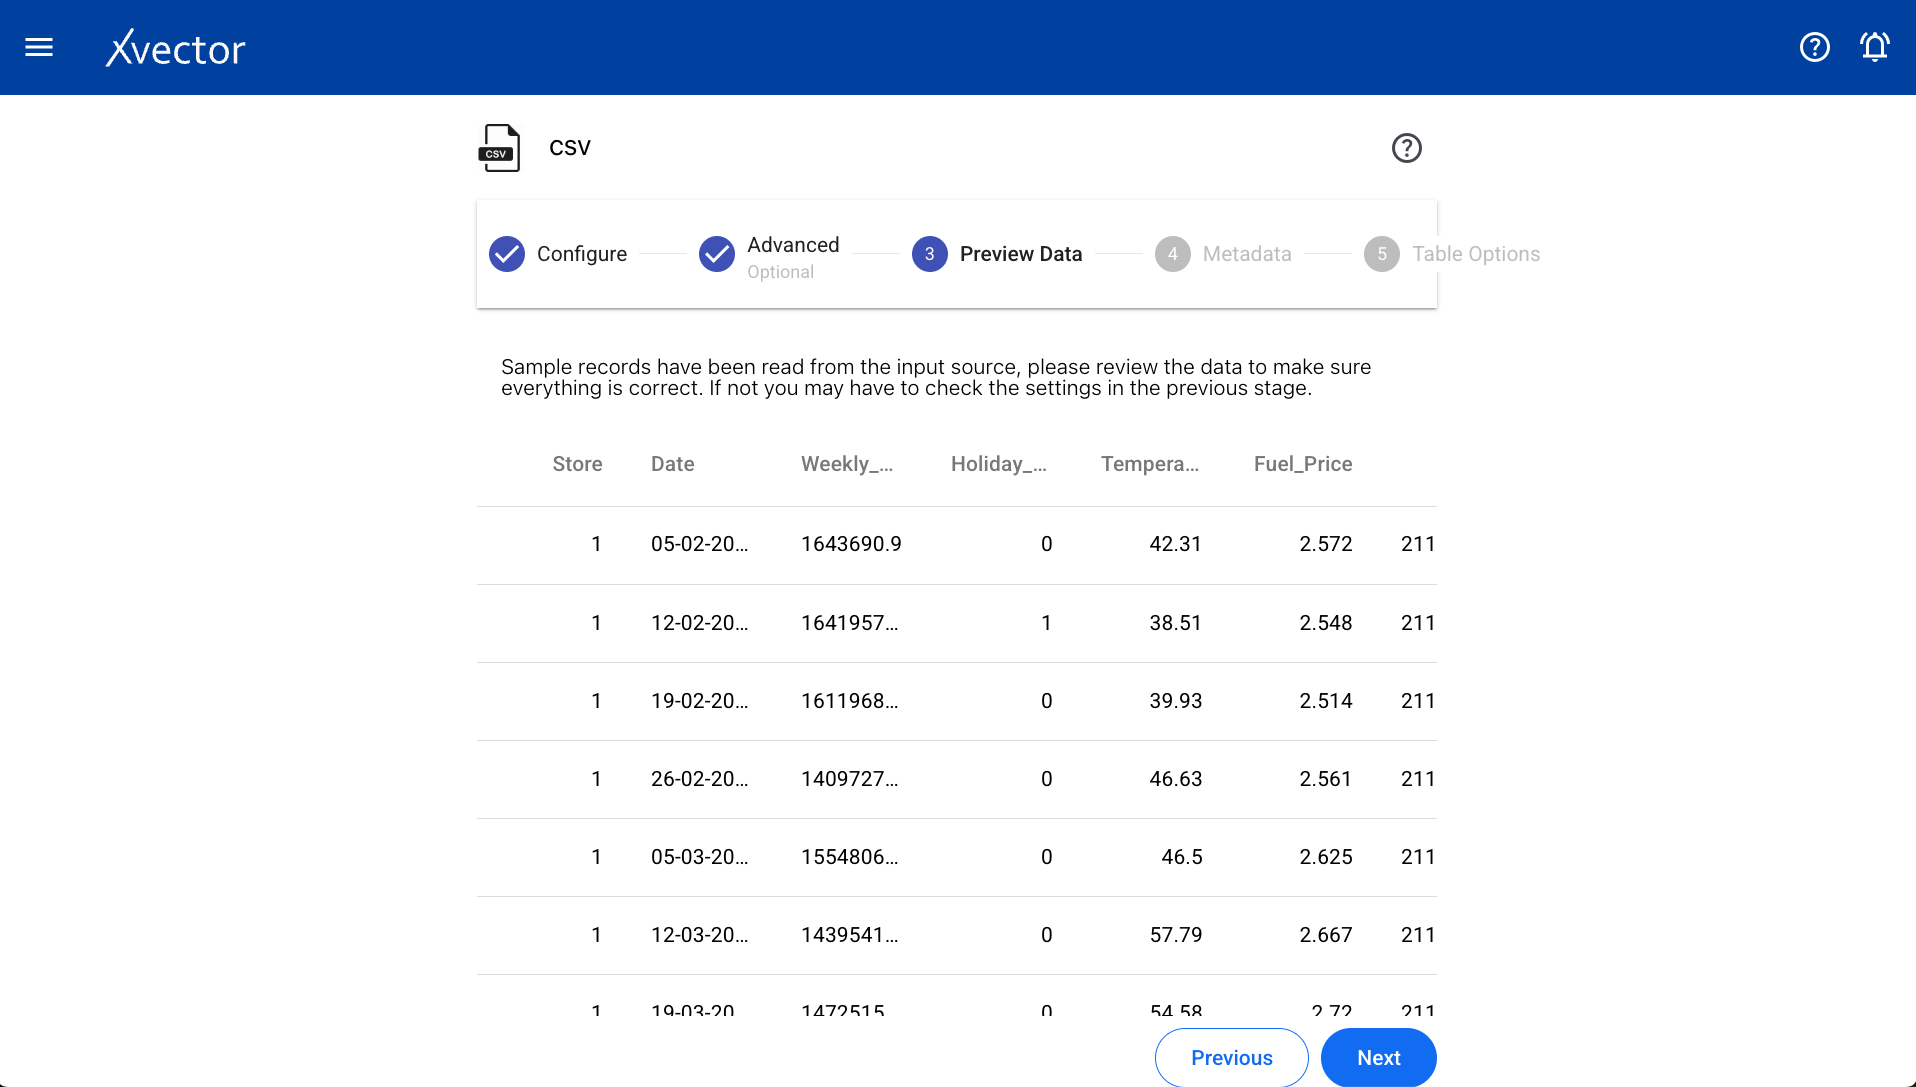
Preview Data
Section titled “Preview Data”Displays a sample of data from the selected file.
Column Metadata
Section titled “Column Metadata”View the automatically inferred metadata and modify it if needed.
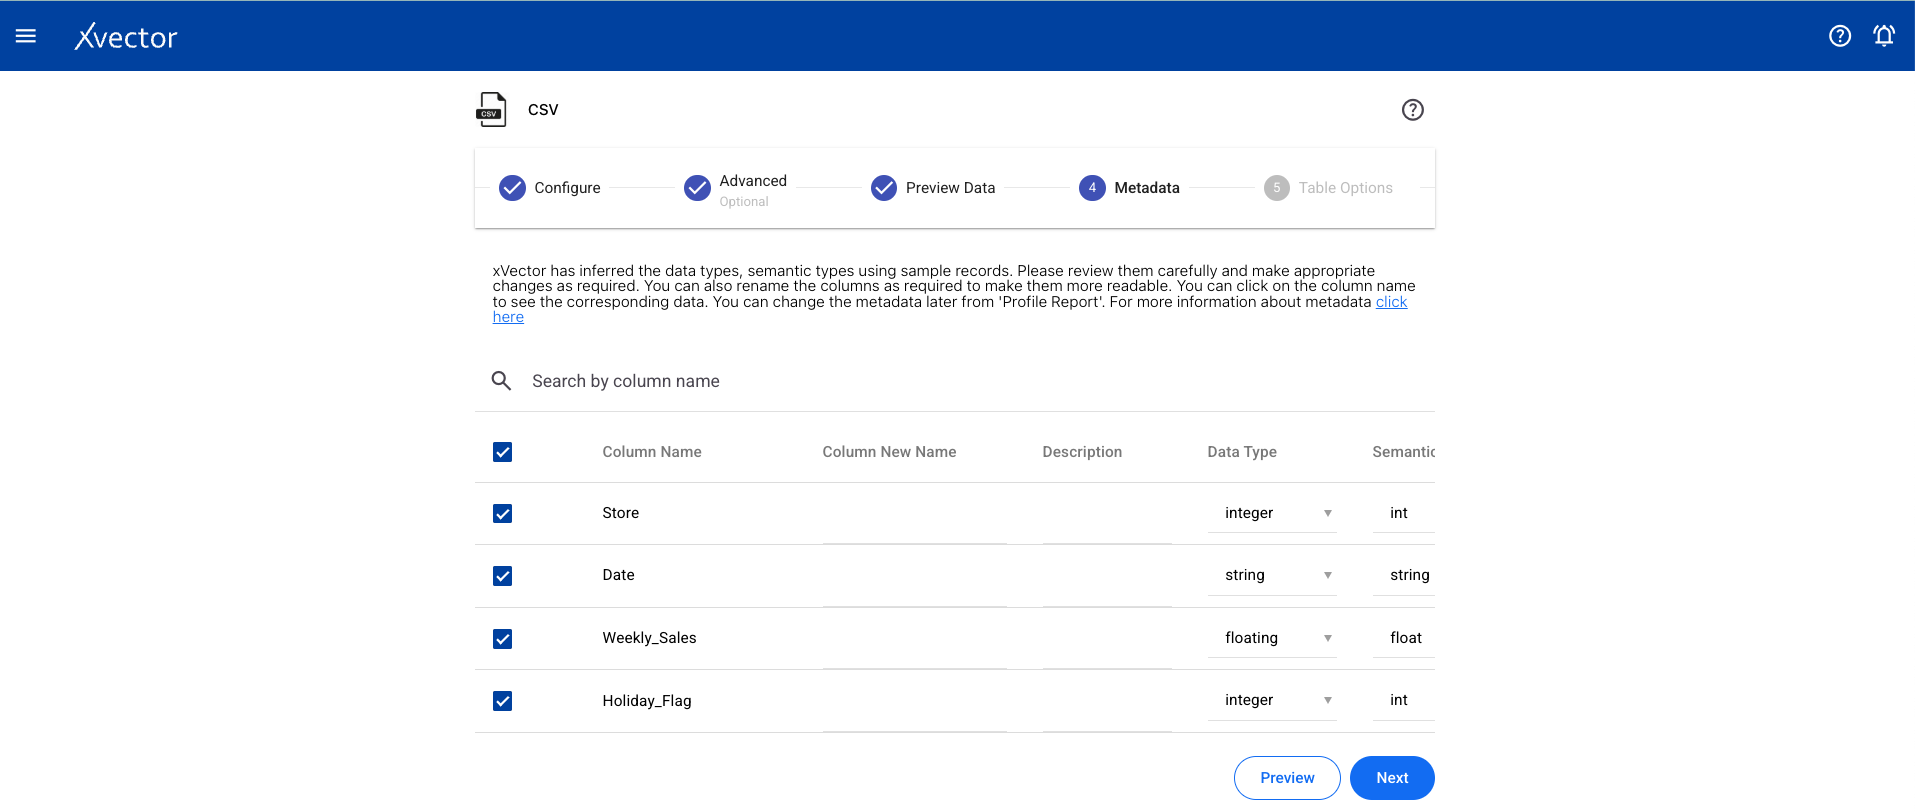
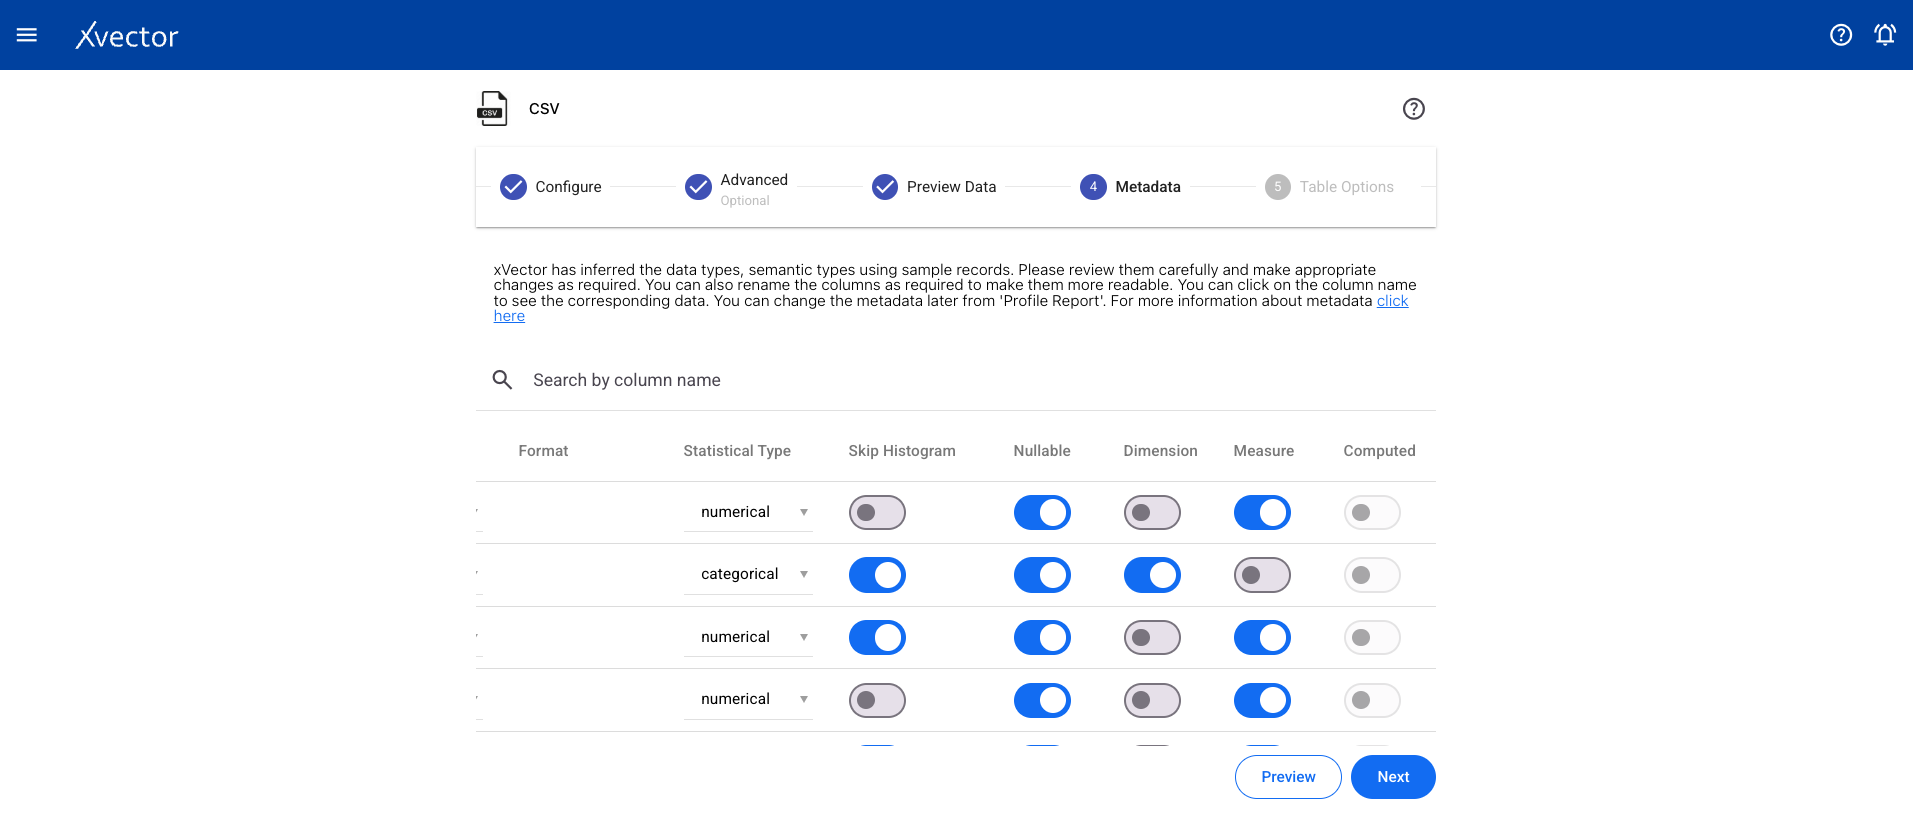
Table Options
Section titled “Table Options”Configure record key, partition key, and other table-level settings.

Click Save to begin the import. A status screen will appear to track progress. On completion, it redirects to the workspace page.
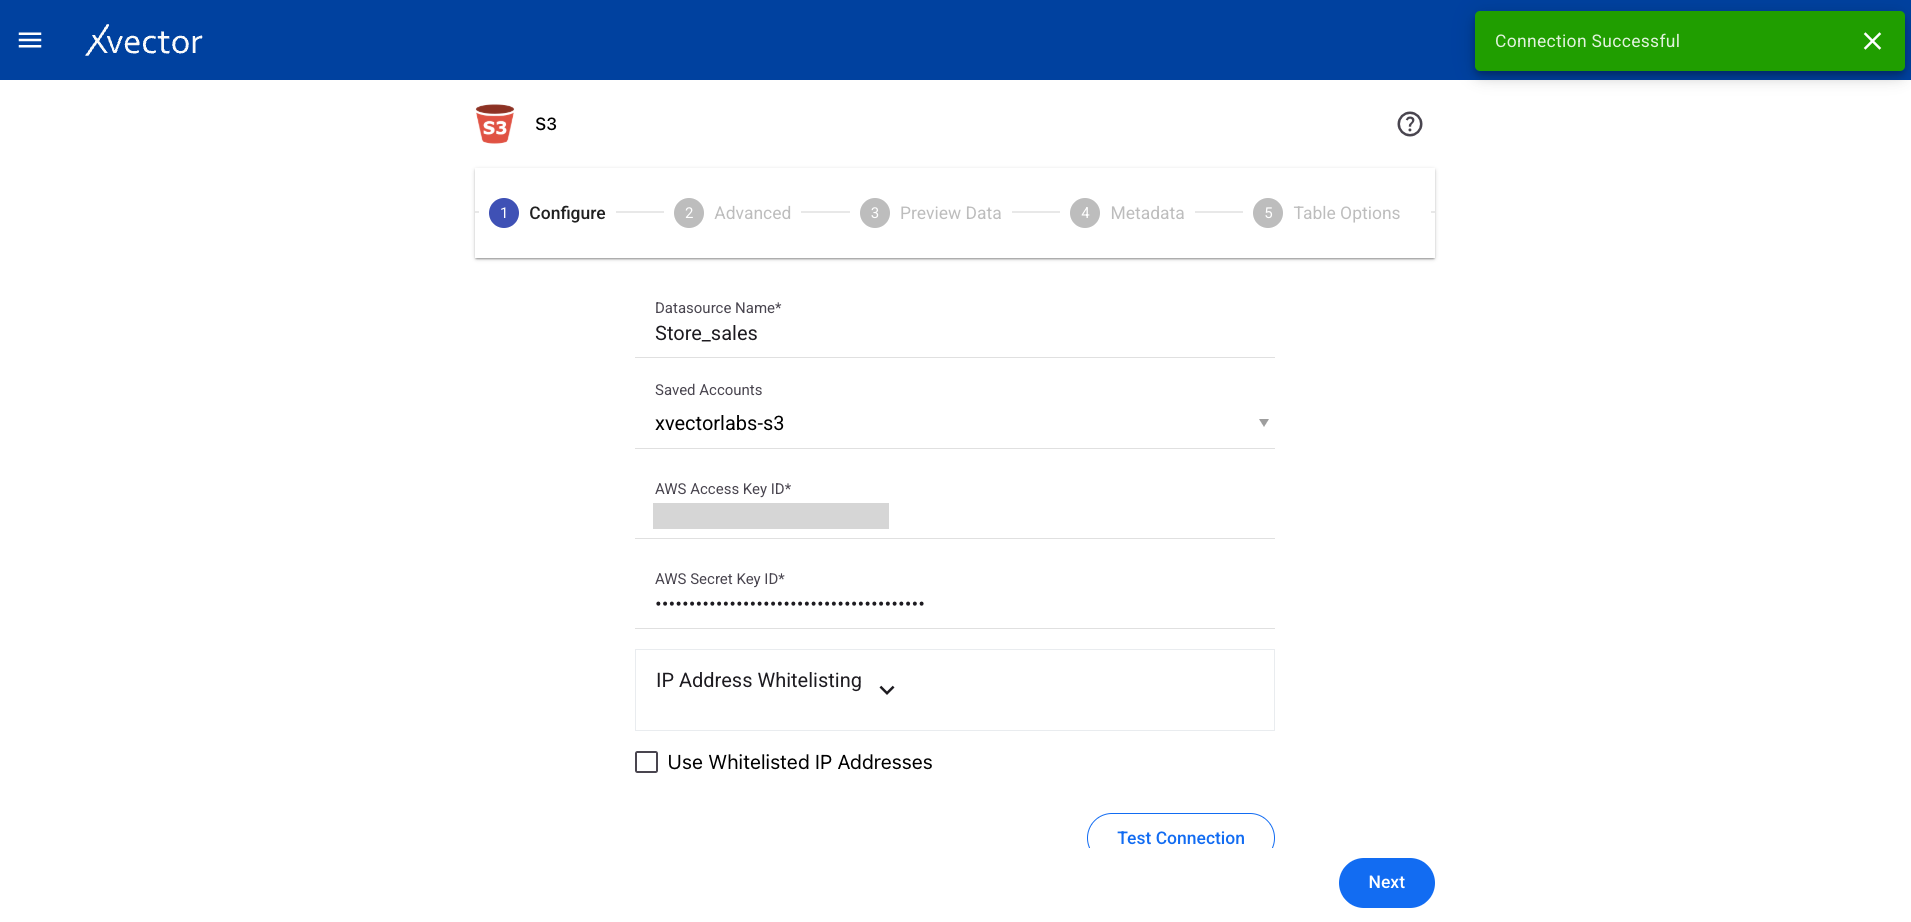
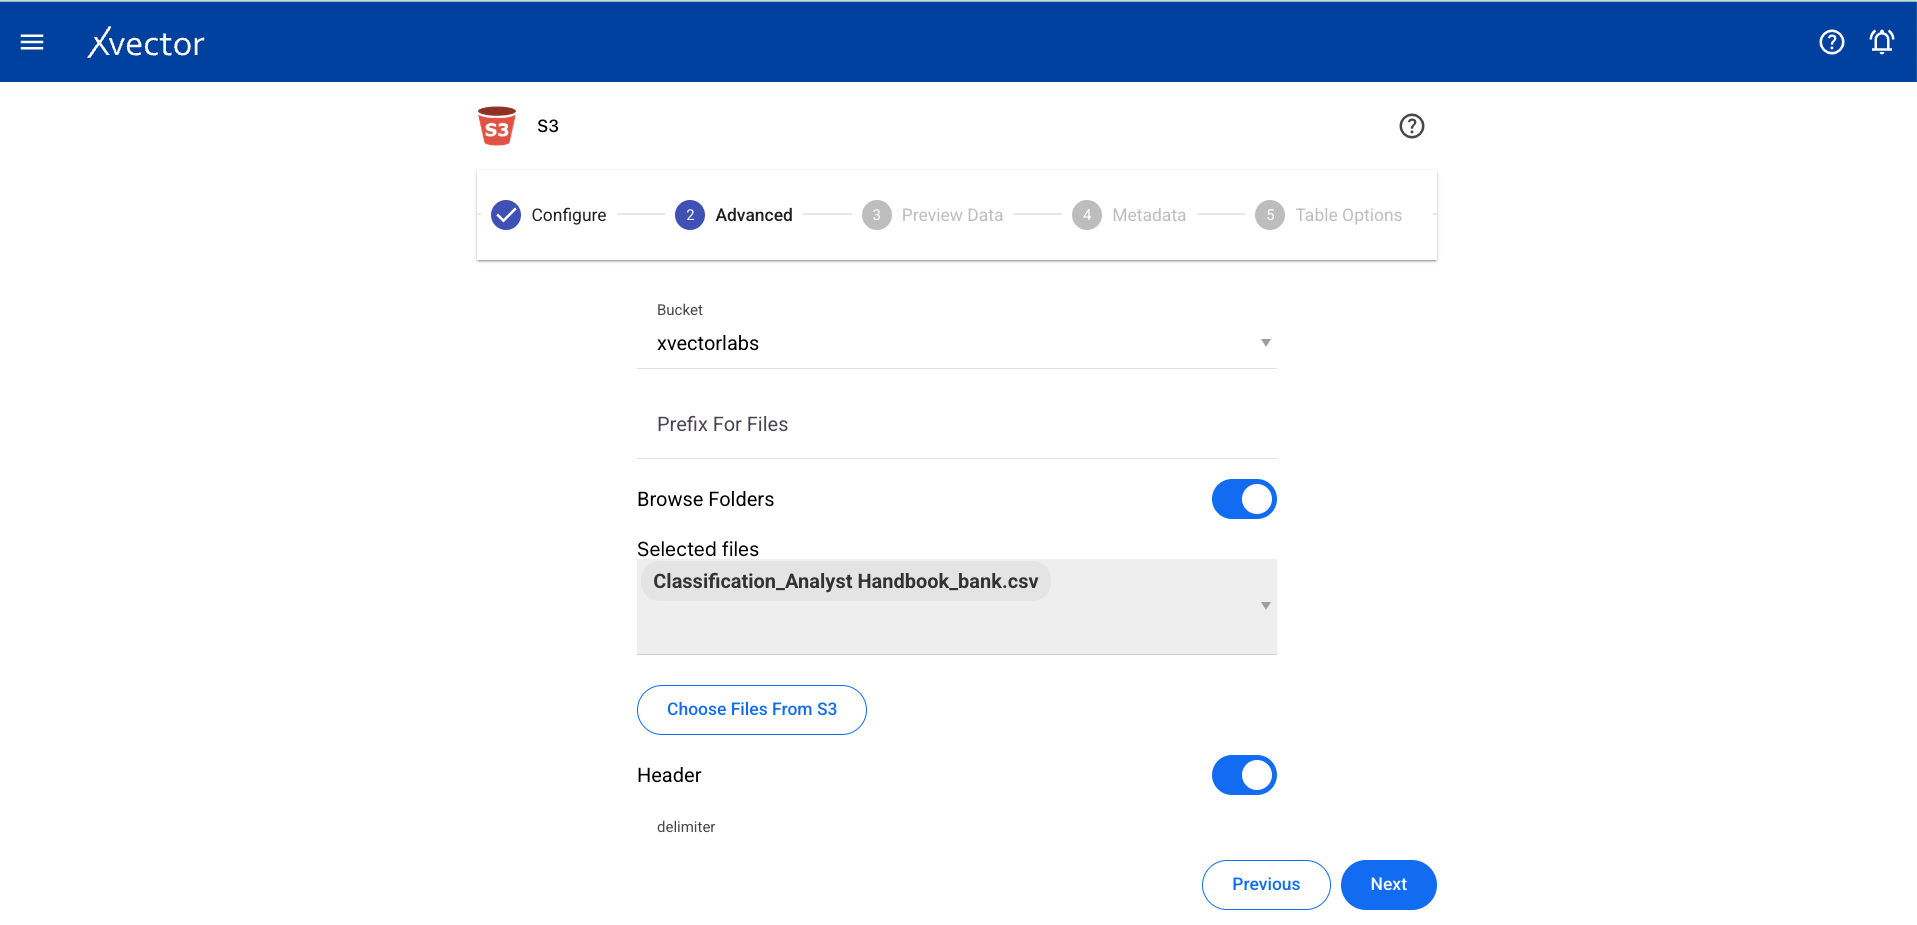
An S3 datasource is used to bring data from an AWS S3 bucket. You need an AWS access key and secret key.
From a workspace, click on Add and choose the Datasources option, then select the S3 data source type.
Configure
Section titled “Configure”| Field | Description |
|---|---|
| Datasource name | Provide a meaningful name for the data |
| Saved accounts | Select from already created accounts |
| New account name | Provide an account name for creating a new account |
| AWS access key ID | Provide the AWS access key ID |
| AWS secret key | Enter the AWS secret key |
| Allowed IPs | Shows the allowed IPs list |
| File type | Choose file type (CSV, JSON) |
| Test Connection | Click to test the connection with provided credentials |
| Extension | Choose file extension (CSV, JSON, GZIP) |
Advanced
Section titled “Advanced”| Field | Description |
|---|---|
| Workspace | Choose from available options |
| Bucket | Select the source S3 bucket |
| Prefix for files | Provide prefix for files |
| Choose folder | Choose files from the S3 bucket |
| Header | Set to true if header is present, otherwise false |
| Delimiter | Choose a delimiter according to the file |
| Encoding | Select encoding |
| Quote / Escape / Comment | Character settings for parsing |
| Null / NaN / Inf values | String representations for special values |
| Multiline | Parse one record across multiple lines per file |
| Quote Escape Character | Escaping the escape for the quote character |
| Empty Value | String representation of an empty value |
| Write Option | Choose from Upsert, Bulk Insert, Insert, Delete |
| Expression | Write expressions to be executed while reading the data |
Preview Data
Section titled “Preview Data”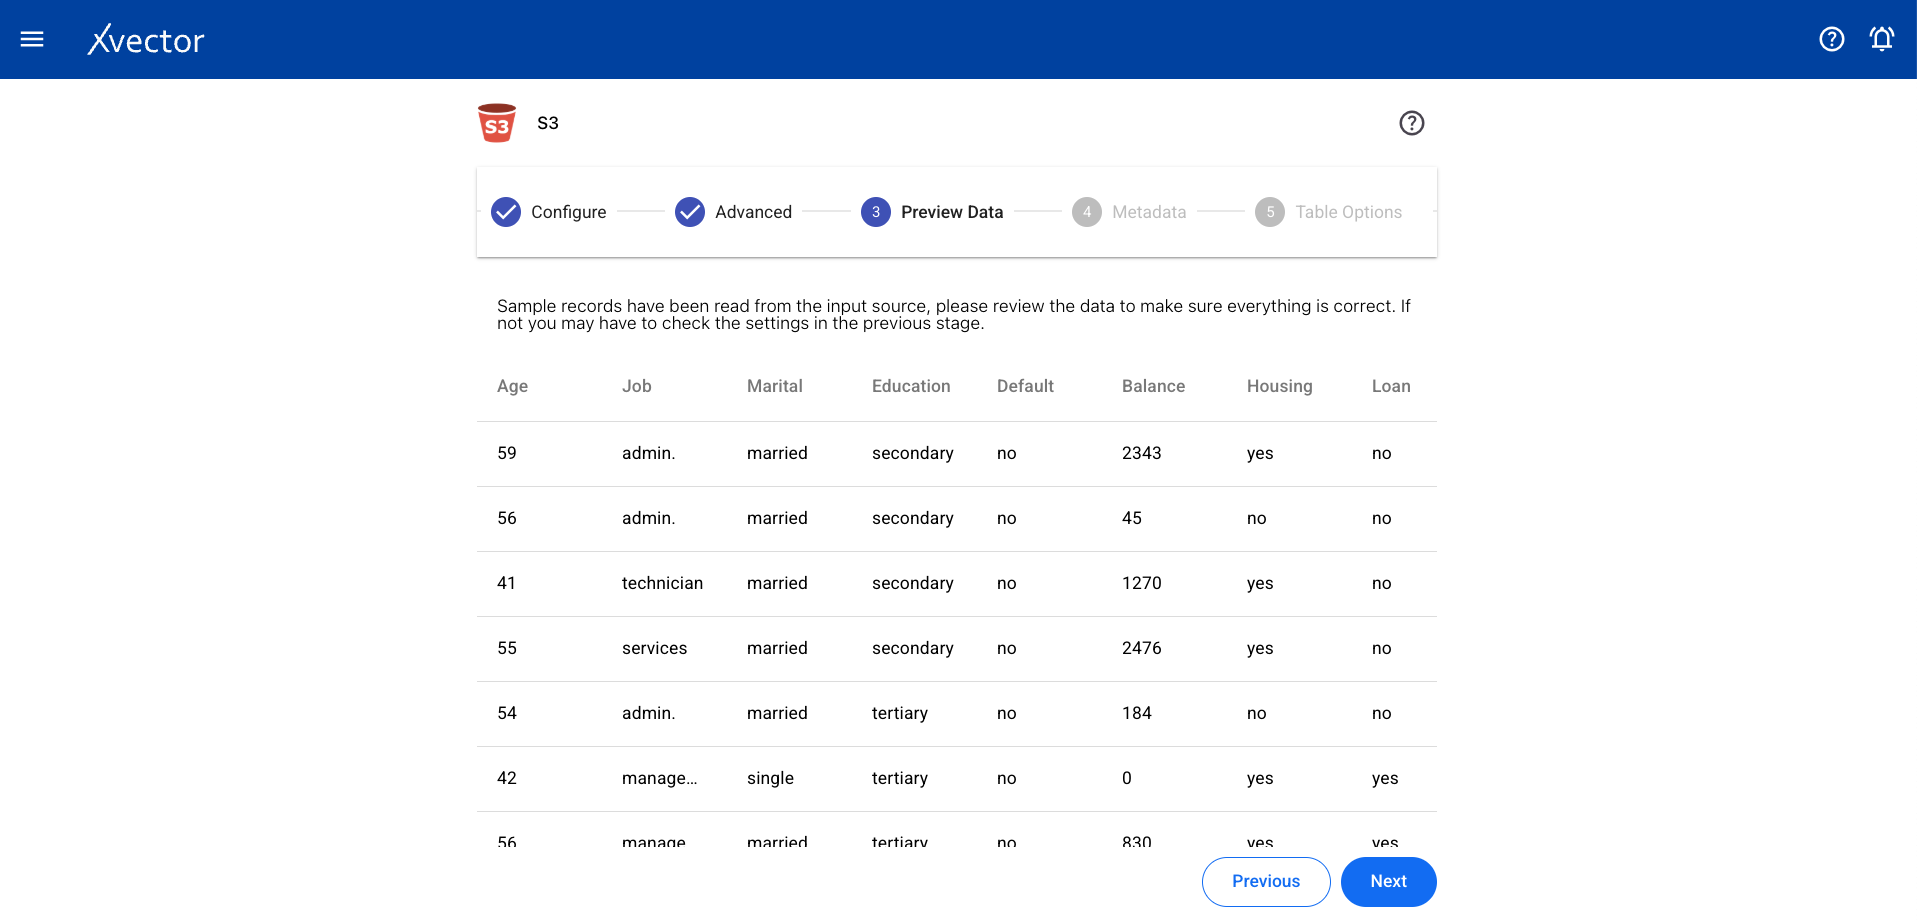
Metadata
Section titled “Metadata”View the automatically inferred metadata and modify it if needed.
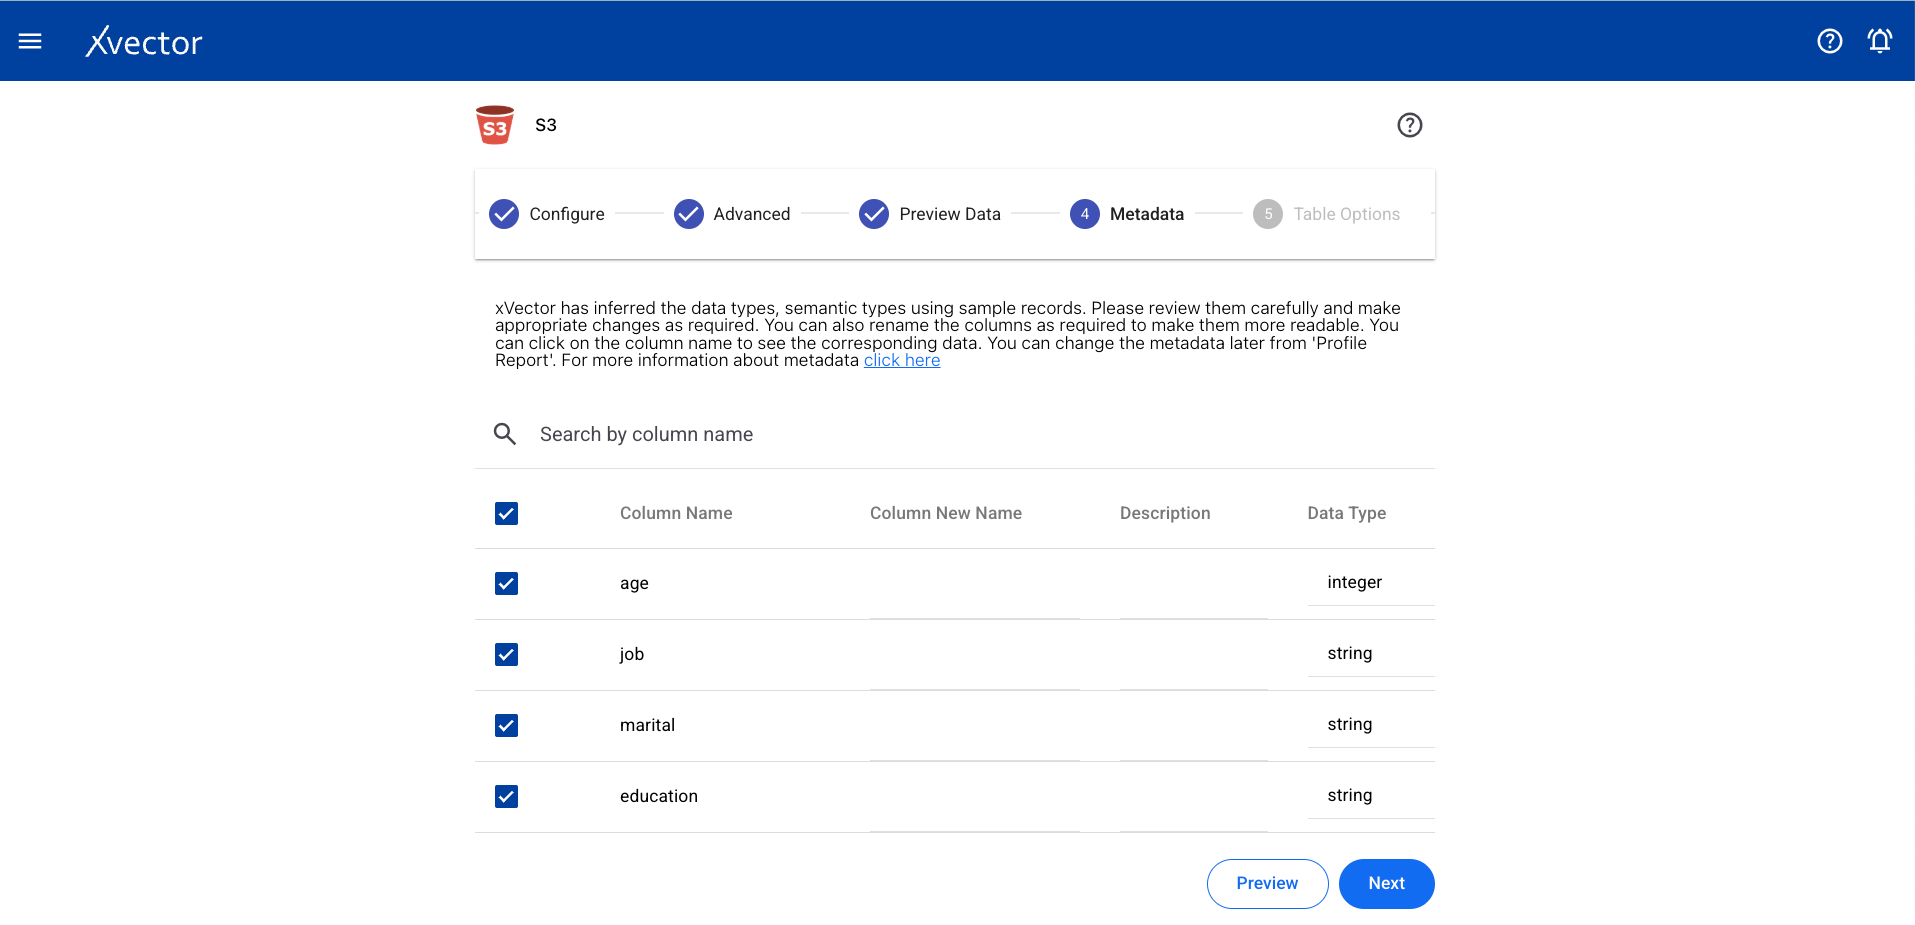
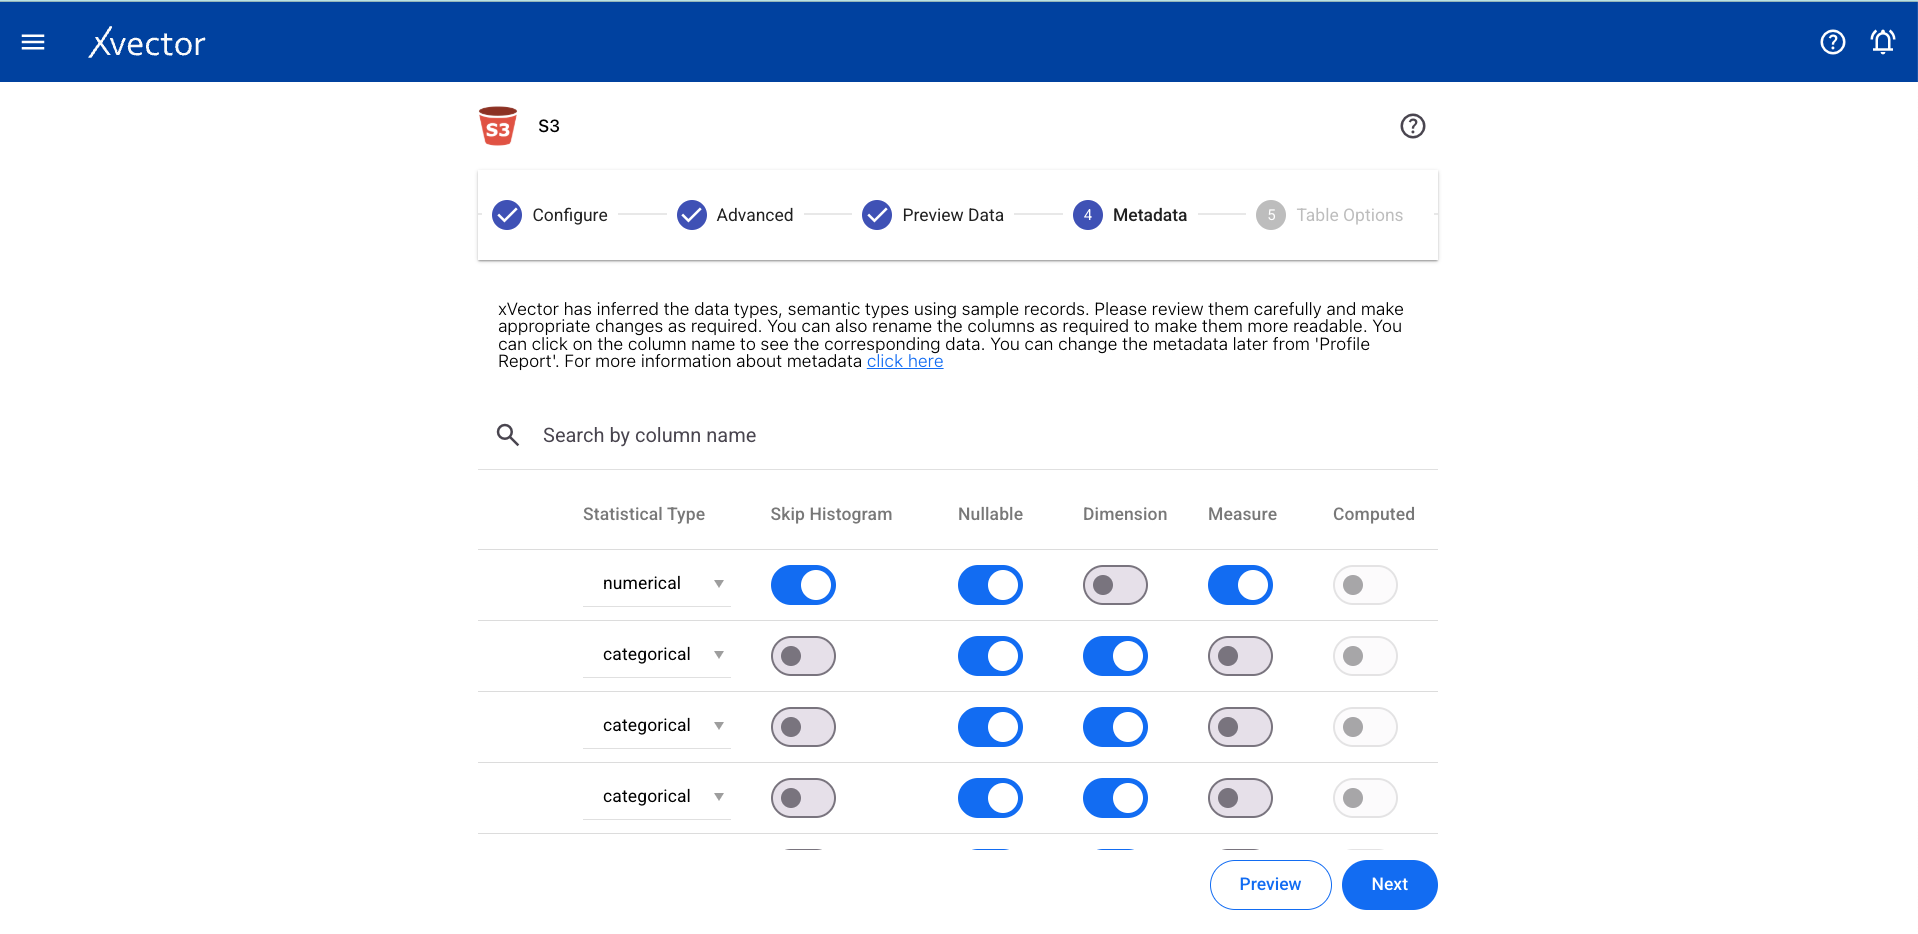
Table Options
Section titled “Table Options”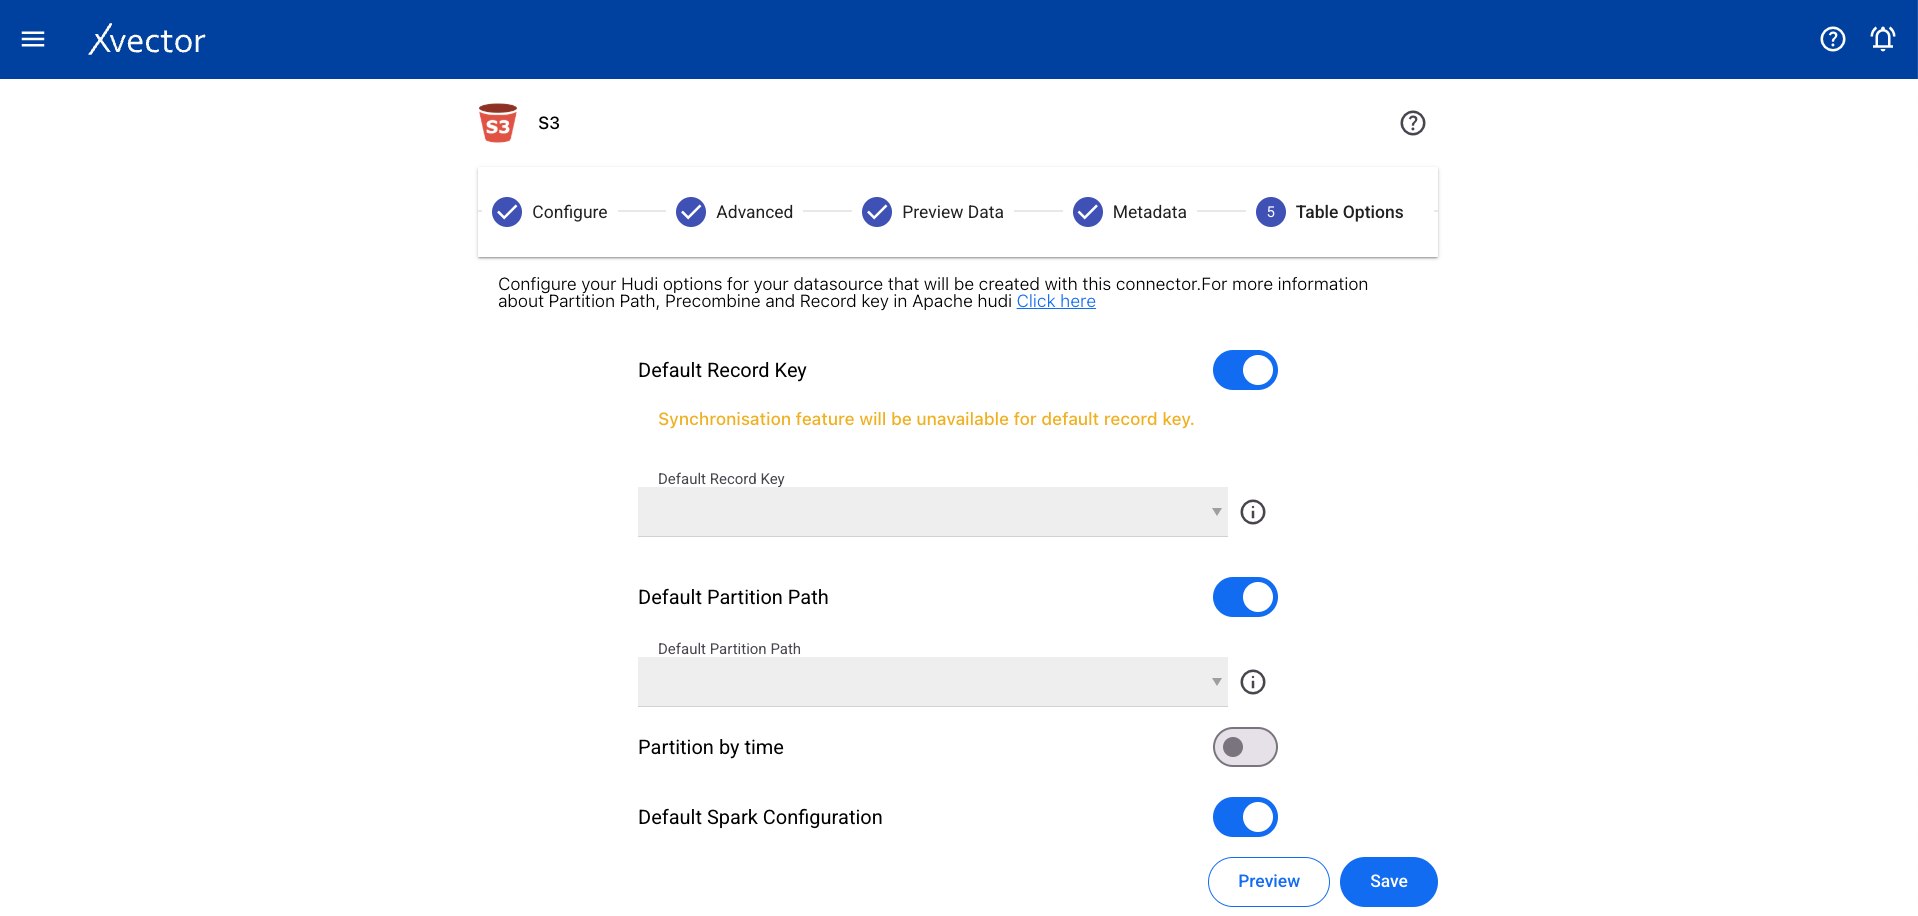
Click Save to begin the import. A status screen will track progress and redirect to the workspace on completion.